Last updated: April 19, 2014 at 14:47 pm
On the Garmin website, on YouTube, and across the Internet, there are a great many different videos that I have found to be helpful as I tried to understand how to make the best use out of the Zumo 660 that I purchased, and that I use on my bike.
Garmin Training videos for BaseCamp (Master list available here)
- Introduction – (02:52.00) Get started with Garmin BaseCamp for PC. The video will get you familiar with the program’s map screen and explain the types of data you can create and manage.
- Tracks – (01:23.00)Find out how to create, edit and analyze tracks using Garmin BaseCamp for PC.
- Tracks are records of a route that you’ve taken while the device was turned on. Even if you are not navigating with the Garmin, as long as the device is turned on and the map is visible, the device is recording the roads that you travel, and the time that you spend in a particular location. Because the Garmin also has built-in topographical information, you will also be able to see the elevation at each point in the log of your journey.
- Sharing – (01:38.00)See how easy it is to transfer way-points, routes, tracks, maps and more to and from your Garmin device using Garmin BaseCamp for PC.
- Routes – (04:27.00) Learn how to create and edit routes in Garmin BaseCamp for PC so you can navigate with them using a Garmin device.
- Generally, creating a route is simple and easy, but it is important to note that some of the menu items shown in the video have moved within the menu options within the menu bar. In addition, it is very important to note that in order to create a route using the new Route capability, you must drag way-points onto the Start and End route boxes. Originally, I tried to select an item from the map, and drag it to the dialogue box, but soon discovered that you must drag way points, and not points from the map.
- Find – (01:29.00) Learn how to use the Find Tool in Garmin BaseCamp for PC to search for addresses, points of interest and more.
- Birdseye Imagery – (01:34.00) Discover how to download and transfer high-resolution satellite imagery and detailed raster maps to your Garmin device using Garmin BaseCamp for PC.
- I’ve tried to use this feature on my Zumo 660, and I was immediately presented with an error message indicating that my device was not enabled for this type of data. So, I’ve given up, and moved on to the next set of features.
- Organize your data – Learn how to organize your data in Garmin BaseCamp.
- Garmin is certainly trying to show us how to organize all of the way-points, lists, routes, etc. But, I find their approach to be confusing, and not as helpful as it could be. So, here’s how I think about it…
- You should think about using lists to organize your way-points, routes, and logs of trips that you’ve taken. Let’s think about how that might be useful… In my case, I’ve decided to organize all of my routes into a list called Routes, and all of the Way-points into a list called Way-Points. So, in this way I can see only the information that is relevant to me, at any point in time. For example, if I’m going to take a drive on the bike, then I’m either going to use a Route that I’ve already created, or I’m going to create a new Route. In either case, I would want to know the naming conventions for all of my previous routes, so that I can make it easy to understand what a route is for, and where it goes. Once I create the new Route, and I place it in the list called Routes, I would then want to add Way points to it. At this point in time, I will select the list that includes all of the Way-points, and I’ll click and/or drag them onto the route that I’m creating.
- Adventures – (06:03.00) Learn how to turn your hike, motorcycle ride, or geo caching trip into a Garmin BaseCamp Adventure.
- Garmin Adventures are a very good idea in concept, but it seems to me that they take a while to create, and creating them will only pay off if you well and truly want to share what you’ve done with others. Think of an adventure as a way to show your friends the route that you took on a given day, or over a number of days. If you’ve also taken pictures, video, and have maybe also tracked your activities with a diary of the trip, then your trip is a good candidate to be turned into an Adventure.
- Creating an adventure is easy, and fast, but it is the need to add pictures, video, and notes to the adventure that really takes all of the time. I plan on producing an adventure for each day of the Patagonia tour, and into that adventure I’ll add pix, videos, and the notes that I’ve taken during the trip. I plan on doing this because I’ve been trying to find good video of motorcycle trips across Patagonia, and to be honest, they are either non-existent, or poorly done. Even the video provided to me by Compass Expeditions left a lot to be desired. So, my plan is to take the tour with Compass, and then produce a really nice Garmin Adventure, which they can share with their future customers.
- How to download maps to an SD Card – (03:04.00) An explanation of how to install new maps, and have them placed onto the optional SD card for your Garmin device.
- Transfer maps and data to Garmin GPS Units – (04:54.00)
Basecamp – Tips and Tricks
After getting my Garmin Zumo 660, I began using Basecamp to lay out routes which would then be used to navigate thoughout a ride, on a given day. Almost immediately after I began getting familliar with Basecamp, I found that some functionality within Basecamp of it simply did not work as expected. As a result, I have spent more than 6 hours on the phone with Garmin support, spanning 3 or 4 different phone calls. While I did not always get the answer that I wanted, or that solved the problem, the folks at Garmin were always very reasonable, and they tried very hard to help solve the problems. So, in most cases, we either solved the problem together, found a work-around, or we figured out that there was a bug in the software. In this section, I’ll attempt to provide you with some insight on how to best make use of Basecamp.
Understanding your library
Within Basecamp, there is the concept of a library. The Basecamp library is a way to manage the set of things that you’ve saved on your PC. You can view, edit, and load these things on to (Send to) a device (Your Zumo, or a SD Memory card in your Zumo). Within the library, you can simply put all your “things” into your collection, or you can organize these things in a way that makes it easier to find things. Lets’ assume the following…
- That you want to keep all of your things organized
- You want to keep track of way points, routes, and other things
- You travel primarily near your home, but sometimes you do rides that are hundreds of miles long, and take you to destinations that you’ve never been to before, or visit very seldom.
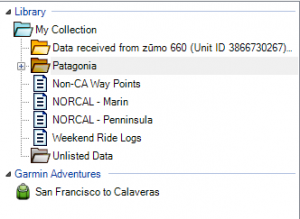
The image above shows a number of important concepts. First of all, there are two folders that I’m using to store two different kinds of data. One folder holds data that I’ve recorded on my Zumo, and which I’ve uploaded back to my PC after I’ve completed a ride. These things are basically ride logs. I’ve also created a folder called Patagonia. Below the Patagonia folder, you can see other things, which are lists.
- My Collection – Includes Folders, Lists, Waypoints, Routes, and a Garmin Adventure
- The Patagonia folder = Includes Lists which also contain way points, and routes. The lists are organized according to which day I’ll be riding, on the Compass Expeditions tour of Patagonia in 2014.
- The other lists – These lists allow me to organize way points, and routes, into a list that keeps common information together.
- The NORCAL – Marin list contains waypoints and routes for the area that is about 75 miles North of my home, in an area known as Marin County. I don’t get a chance to go there very often, but when I do, I load the Garmin with this one list, and it contains all of the important waypoints and routes that would be appropriate if I were riding in Marin. You see, what I’m tryin to do is to load the GPS with only the information that is relevant, thus making it easier and more efficient for me to choose a waypoint to navigate to, or a route to follow.
- The NORCAL – Peninsula list contains Way Points, and Routes that are near my home, and that I use much more frequently. These way points and routes are covering an area known as the San Francisco Bay Peninsula.
- Unlisted Data – This list contains all of the waypoints, and routes, which are not part of any other list.
Let’s look at the Patagonia folder in more detail

Caption: A look at my Library
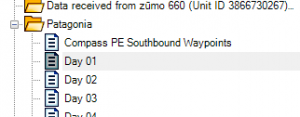
Caption: A blowup Day 01 from the Patagonia folder, selected, and ready to be used.
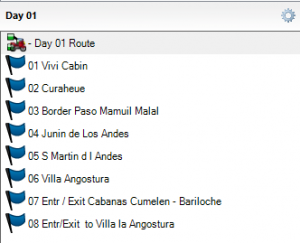
Caption: A more detailed look at the 8 waypoints, and the route that is contained in the list for Day 01 of the Patagonia tour.
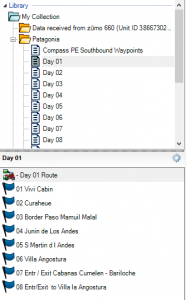
Caption: A look at the two windows, adjacent to one another, with the list selected above, and the contents of that list shown below.
Notice that, within the Patagonia folder, I’ve created lists for 10 days of riding. Each list contains the way points, and the route for that day. You can see that in this example, I’ve selected the list for Day one. The last of these 4 images shows how I’ve selected day 1, and the that the list contains a single route, and a series of waypoints. You can see that the icons that indicate whether an item is a list, a waypoint, a route or a folder are easily distinguished from one another.
When you organize waypoints and routes in this manner, it is easy to share the waypoints with others, while keeping them extremely organized. So, you might ask, what exactly is a waypoint, and how would it look in a list.
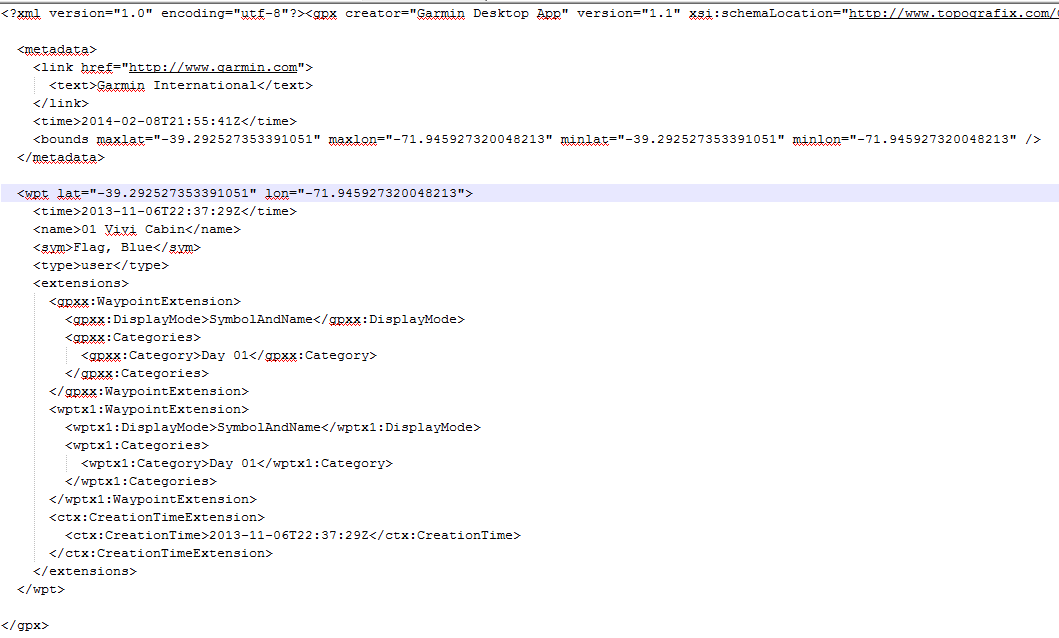
This file (A GPX file) represents a single waypoint. Notice that the file shows the name of the waypoint (01 Vivi Cabin), how to display it (SymbolAndName), the longitude and latitude, the category(Day 01), the symbol (Flag, Blue), and so on and so forth. The GPX file for a list would simply be a number of these waypoints combined in a single file. The GPX file for a route would also be very similar, but it would contain the waypoints, and any navigation commands that are related to traveling between the way points themselves.
Why would you need a list called “Unlisted Data”?
Well, the short answer is that you don’t, but I find it to be quite useful. You see, each and every time you create a waypoint, it gets inserted into the list that you’re currently working with. A way point can be in any number of lists at the same time if you like. For example, it would make sense to have the waypoint for my home address included in all routes, and lists that contain data-points that are geographically close to home. While, it seems obvious that it will provide no benefit to me to add my “Home” waypoint to any of the routes for the Patagonia trip.
Creating Waypoints
While busy creating waypoints, I noticed that sometimes, the waypoint contained the precise address of the waypoint, and other times, it contained just the coordinates of the waypoint. Let’s take a look at the two different examples.

First of all, since we’re on a motorcycle, make sure that the route is setup as a Motorcycle route. You can see that I’ve got Basecamp setup for Motorcycle routes. When you move your mouse over a place on the map, you’ll see a popup that will give you choices for what you would like to capture, and convert to a waypoint. In the image below I”ve moved the mouse cursor over the intersection lf Highway #1 and Kelly Ave, in Half Moon Bay, California, USA. When I do this, I’m able to select the address, or a local restaurant from which to create a waypoint.
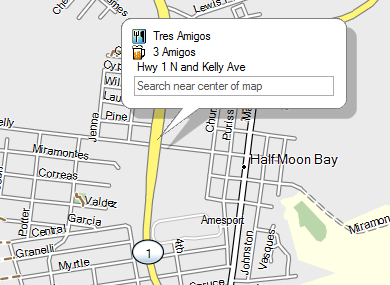
I’ve created a waypoint called Tres Amigos, and when the s/w bug occurrs, you capture the waypoint like I’ve represented in the first image below. When the bug is not manifesting itself, then you’re able to capture/create the waypoint like you see in the second image. Notice that the second image has all of the details for the restaurant, and the first does not.
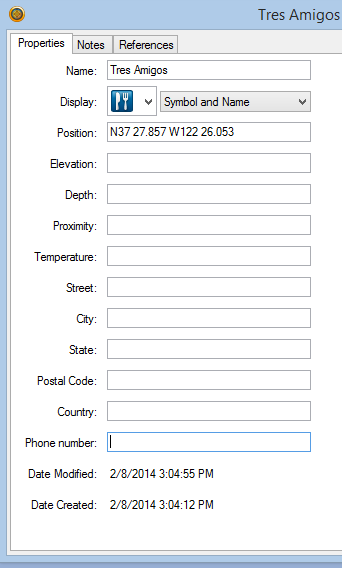

If you find yourself in this situation, you can solve it by configuring BaseCamp for Automobile routing (as shown below), and then reconfiguring it again for Motorcycle routing. It seems that this simple procedure sets the s/w into the correct state, and the bug no longer manifests itself.

Configuring your Garmin Zumo 660
I have found that it can be challenging to configure the Garmin so that it performs and acts just the way that you would like it to. So, for the sake and sanity of others, I’ve taken screenshots of all of the key configuration screens and choices, and presented them here, with an explanation of why I made the selections shown on the screen.
Main Menu – Settings
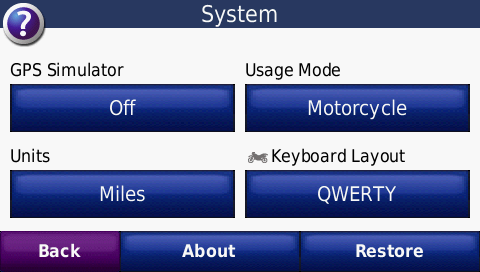
Main Menu – Settings->System
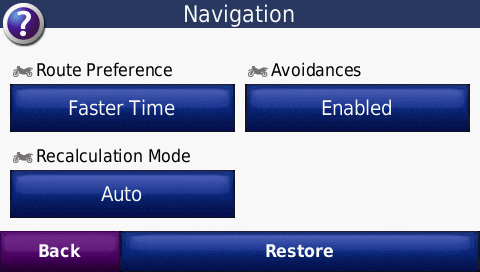
Main Menu – Settings->Navigation
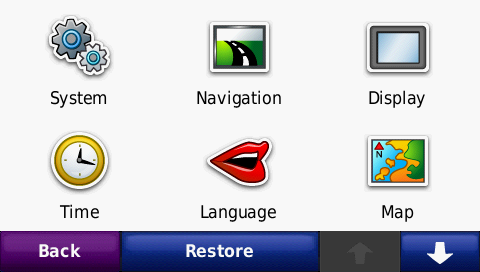
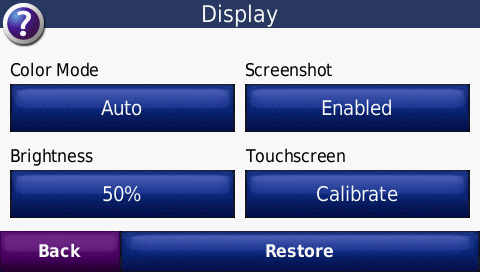
Main Menu – Settings->Display
Note: Notice that on this screen, I have enabled the “Screenshot” feature. When this feature is enabled, a small icon of a camera appears in the upper Right Hand corner of the display of the Garmin Zumo 660. When you press this icon, you take a picture of the current screen, and the image is storee on the Zumo in .bmp format. Once the Zumo is reconnected to the PC, using the file management utilities on your PC, you can select the Zumo from under the My Computer menu (On a PC), and navigate to the location where all of the screenshots are stored, downloading and deleting the pictures as you like.
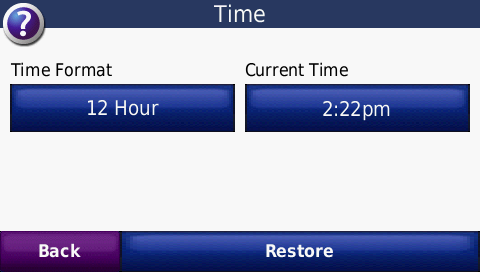
Main Menu – Settings->Time
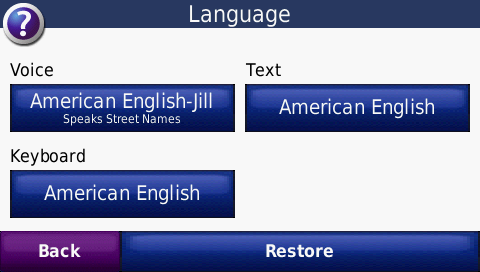
Main Menu – Settings->Language
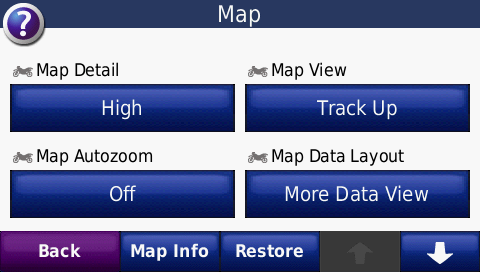
Main Menu – Settings->Map
- Map Detail: I’ve set this to high, so that I can see the maximum amount of detail for the surrounding area, while driving.
- AutoZoom: I found this feature quite annoying when it was enabled. With AutoZoom enabled, as you ride, the screen seems to arbitrarily zoom in and out, according to some set of rules that I never thought made sense. I have disabled it, which allows me to choose the level of zoom for any map, on any trip, and to have the level of zoom remain constant, until I change it. This way, I can reach up and press the “+” or “-” key if I need more or less zoom.
- Map View: I found that by setting it to track up, I”m always viewing the map based on the direction that I’m driving. For me, this proved to be the best choice.
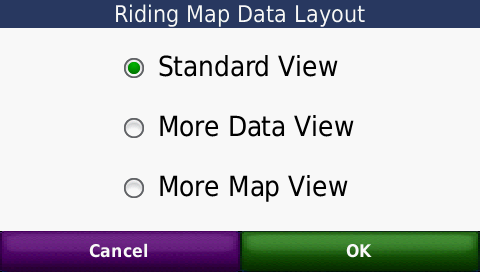
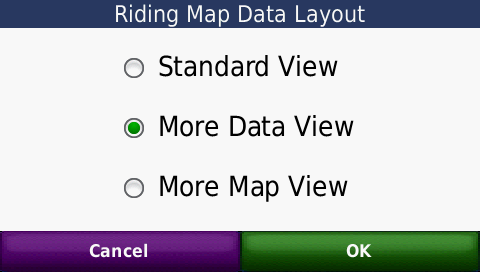
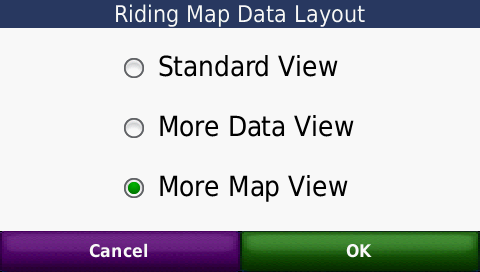
Main Menu – Settings->Map->(Standard, More Data, More Map)
- Standard View: Provides a small amount of data displayed on screen, usually 2 data fields
- More Data View: Provides 4 data elements, which appear on the Right Hand side of the display. Pressing on any of these 4 items allows you to choose which data is displayed in the area which you touched.
- More Map View: Provides all of the screen for the Map, and no data is visible.
 –
–  –
– 
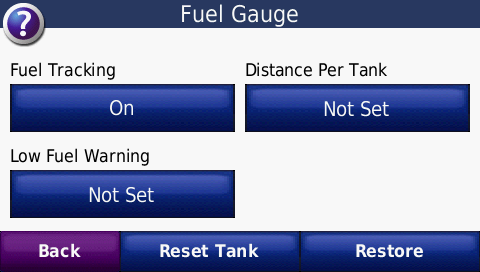
Main Menu – Settings->Fuel Guage
Note: As of the time and date that I’ve written this post, I had not had a chance to use this feature yet, although it looks to be helpful, so I plan on using it.
Obtaining maps for your Garmin
As it turns out, there are a number of posts on other websites and blogs that talk about how you can download maps for free, which can be suited to work with a Garmin GPS device. Below, I’ll show you a number of organizations that help you get maps for free, and also a number of blog posts that describe some of the logic and thinking that goes into finding, creating, downloading, installing and working with your maps.
Organizations that offer maps
- Open Street Map – Maps for Garmin
- Open Street Map – General Info
Blog postings and websites that discuss maps and GPS Navigation
- Moto Treks
- Moto Treks – Helpful links
- Horizons Unlimited – Maps and GPS Navigation
Troubleshooting your Garmin Zumo 660
Q: Why does my Zumo 660 think that I do not have the correct maps on my PC and on my Zumo
– It is possible to install multiple maps onto the Zumo 660. In fact, this often happens entirely by accident. In my case, I (somehow) accidentally installed two maps on my Zumo, and both were available to the Zumo to use to calculate routes. Of course, this was not my original intention…
– It is also possible that when installing the map, you chose to install it into the Zumo, and not on the PC. Once again, this is a very easy mistake to make. To fix this problem, using the Zumo 660 console and the available tools…
– Within Basecamp, after a device is attached to a PC via a USB cable, you can see which maps are installed on the Zumo, but I’ve found that the two maps that showed up in Basecamp, are not the same as the two maps that showed up on the Zumo itself. Notice that on the Zumo, both maps have the same name, but one of them is 3D, and the other is not.
– I’ve been told that Basecamp can have different maps from that of the Zumo. As the story goes, the basecamp map has only major interstates and has less detail. I have not found this to be a true statement.
To see maps from within Basecamp
- Go to Maps>
- Examine all of the maps that are loaded within BaseCamp, or on your device.
- Select the most recent map xxx.14
Q: Is there a limit to the size of MicrosSD card that can be used with the Garmin?
Yes, The limit of the size of the car is 8GB. Micros SD cards which are larger than 8GB will either not work properly, will not work at all, or will limit you to using only 8GB of available storage on the card.
Q: Why does the Zumo 660 recalculate when I place it on the bike, or when I try to download way-points and routes to it.
– It is very likely that the reason that the Zumo recalculates is because the map on the device, and the map that was used to build the routes, or develop the way-points is not the same map. The maps may be very similar, but they have different levels of detail, and the Zumo knows this, and it tries to compensate for this difference by recalculating the routes, using the map that is available on the Zumo
Q: How do you delete logs from device
– Once again, although you can see the data that exists and is present on the Zumo, you cannot delete it when using the Basecamp s/w. The only way to delete the logs that are present on the Zumo is to delete them on the device itself.
To delete the logs, do the following
- Tools>Settings>MyData>ManageLogFiles>Delete-logs
– You must also take into account that you may have, at some point, pressed the button to copy the “Data” from your device, to your PC. Once this has been done, then these log files appear on the Zumo, as part of “internal storage” as well as being in “My Collection” which is present on the PC.
Q: Why do some of the way points keep reappearing on my device.
– It is pretty common to be confused about which data is on the Zumo, and which data is in “My Collection”. As a result, you have probably not actually deleted the way points from the Zumo. It is critical that these items are deleted from the Zumo.
Q: How do I set which fields appear on the Navigation system’s screen, when I’m riding? I would like to have the following…
- Distance to arrival
- Distance to turn
- Arrival time
– Need to set Tools>Settings>Map>MapDataLayout>More-Map-View
– Click on each item to display the information below
Q: Why is it that while I’m driving, and approaching an intersection, the Zumo seems to arbitrarily zoom in on me?
– This happens because AutoZoom is enabled.
– To disable autozoom
- Settings>Map>Autozoon:Off
Q: Can I purchase other maps and have them install on my device and on my PC
– Yes, you can buy this from a 3rd party
– Search Google for “Maps for Garmin”
- The mapmaker will need to guarantee that it is compatible
- Garmin maps are bought from NavTech
Q: Is there a way that I can take snapshots of the screen on the Zumo?
– How to download and use these pictures
Interaction with phone and intercom
Q: I use an iPhone, the Zumo 660, and a Cardo Scala G9, all connected together using Bluetooth. When I’m riding along, talking to someone over the Intercom, and I’m approaching a point where it is appropriate to “Speak the directions to me”, I find that the Garmin will always interrupt the intercom and “speak the directions to me”. I find this annoying and I would like to set the priorities of the various systems, so that I can eliminate this type of interruption. Is it possible?
- No, it is not possible to adjust the configuration used to determine how the various devices are interrupted.